All Seeing. Powder Bed Fusion. 4/5

To print the eyes, I chose powder bed fusion, though it is not suitable for practical parts and is known for being fragile. This method would be more than suitable for creating full-colour textured spheres. Furthermore, eyes not strictly functional pieces even though they have a functional purpose and as they are small solid spheres, would be difficult to break.

The printer I used for the eye spheres is the Gypsum 660 inkjet powder bed fusion printer. I exported the sphere as a textured OBJ which also created an MTL (Material Library File). These files, as well as the original texture source image,  had to be taken into Materialise Magics (Materialise, Belgium) and exported as a ZPR which is compatible with the 3D Print (3D Systems, South Carolina) software to be oriented and sent to print.

The print itself took 59 minutes and each eye contains 237 layers of powder and post-processing extended the entire process to just over a day. The models had to be removed from the powder bed and transferred to the cleaning station to remove powder with compressed air. As the pieces are solid I could use a solid bristle brush to scrub the excess off the surface without risk of breaking them.

After all excess powder was removed, the models must be hardened with cyanoacrylate infiltrant 500/ superglue. I held the models over a box and poured the glue evenly over the surface area; repeating this process twice allowed the glue to absorb into the powder to harden the overall shape. The models are then dried under the in-built heater of the cleaning station overnight before being sanded with various grades of paper. This resulted in a smoother performance from the models when moved around in the eye cups, which would benefit the eyes used in the resin models due to the sharp residue from the support structure causing some resistance when articulating the eyes. With more layers and mixing sanding techniques, the models could have a smoother finish.

All Seeing. SLA Clear. 3/5

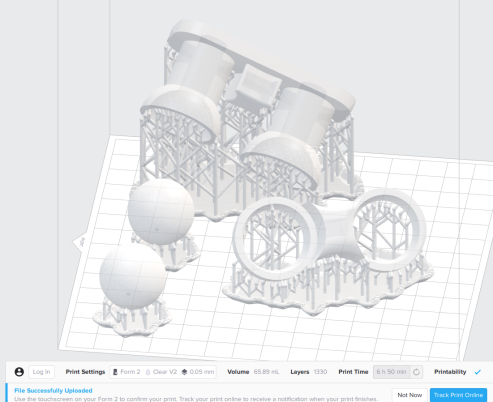
I printed a clear resin version of both the eye plate and the base holder with reduced waste material to observe the difference in material texture and density. The modifications in this design consist of removing the rounded back face for a flat surface and hollowing out the eye stems with a 10mm extrusion.

2019-02-07 (7)

This print uses the same technology as the black resin SLS Form 2 print however it only took 6.12 hours. As this was printed prior to testing the magnets, I did not reduce the material between magnet chambers and yet the magnetic link is noticeably stronger; I consider this is due to the resin being less dense.


|◉ロ◉|

All Seeing. FDM. 1/5

My first test piece took 7.31 hours and was FDM printed on the ULTIMAKER extended 3. The base holder and the removable eye plate are loaded into ULTIMAKER Cura (ULTIMAKER, Geldermalsen) and adjusted the file orientation to best suit the structural integrity of the piece. As the design printed without support material there is some stringiness and rippling in the model base.

The model is made of white PLA (Polylactic Acid) filament (GoPrint3D, Ripon) and despite an uneven finish, both the eye plate and the base slot together. However, the pieces do not fit flush together at a straight angle as the design intended; the eye plate must first be placed in vertically and turned 90°. There seems to be no clearance with this material and the pieces hold tightly together making magnets unnecessary for this version. The missing material on the back face of the eye plate causes large gaps, however, this has doesn’t appear to have affected the function of the design.

The post-processing procedure wasn’t complex however the pieces were difficult to scrape off the build plate and the frayed edges required significant clean-up. Reversing the angle of the eye plate may fix the missing material problem but may result in breakage when being removed from the build plate. The base holder is fit for purpose and very lightweight with the only issues being the sharp edges. As this piece is intended to go inside a puppet head, aesthetics is not a major issue in its usage.


( ゚ᗜ ゚)

Special Collections + ReCap Photo

The initial introduction to Autodesk ReCap Photo using artefacts, courtesy of MMU special collections.

I took 80 photos of a small sculpture by Catrin Mostyn Jones.

green1

The results are impressive with only some minor inaccuracies in the geometry. With steadier lighting and camera work this may be used to gather scan information without scanning programs. This using this with data from CG imaging techniques may have interesting results when documenting CG models.


﴾๏෴๏﴿